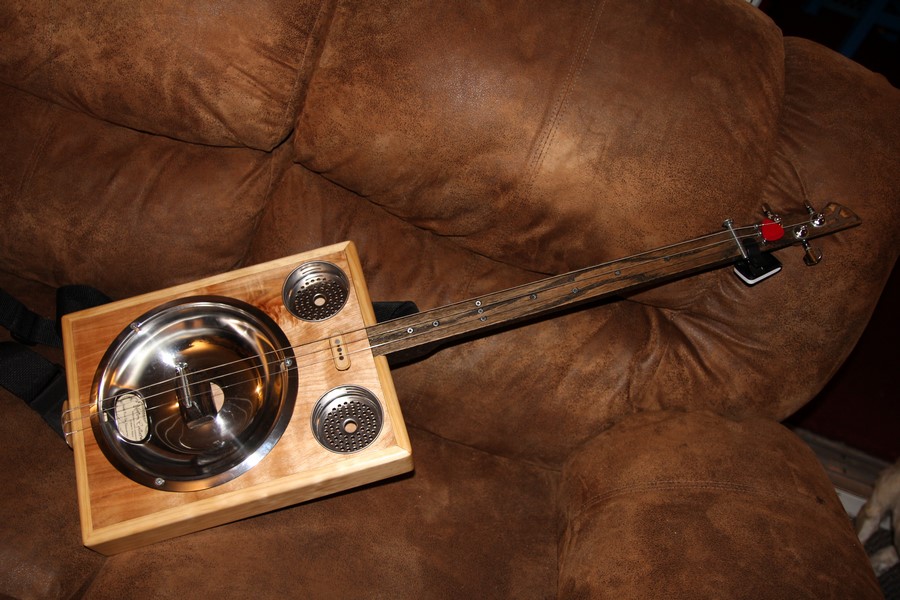
The “Pine Box Resonator” is my first guitar build. It was designed and built to be my own version of a Cigar Box Guitar. This is a 3 string guitar that is tuned open G, GDg.
SPECS:
- 3 strings (open G)
- Fret-less
- 25.5″ Scale length
- Floating bridge
- 1.5″ Neck width
- Magnetic pickup
- Resonator cone
- Strings are nickel wound .042w (G), .030w (D), .017 (g)
Sound Sample
The Build Process
Planning
I started off by watching many how to videos and reading a few how to articles including an 8 page builders guide located here.
http://www.cigarboxnation.com/page/free-plans
I took the information gleaned from these sources and incorporated it into my own design. Because I did not use a cigar box, I had to design my own box and come up with new ways of attaching components like the neck and bridge.
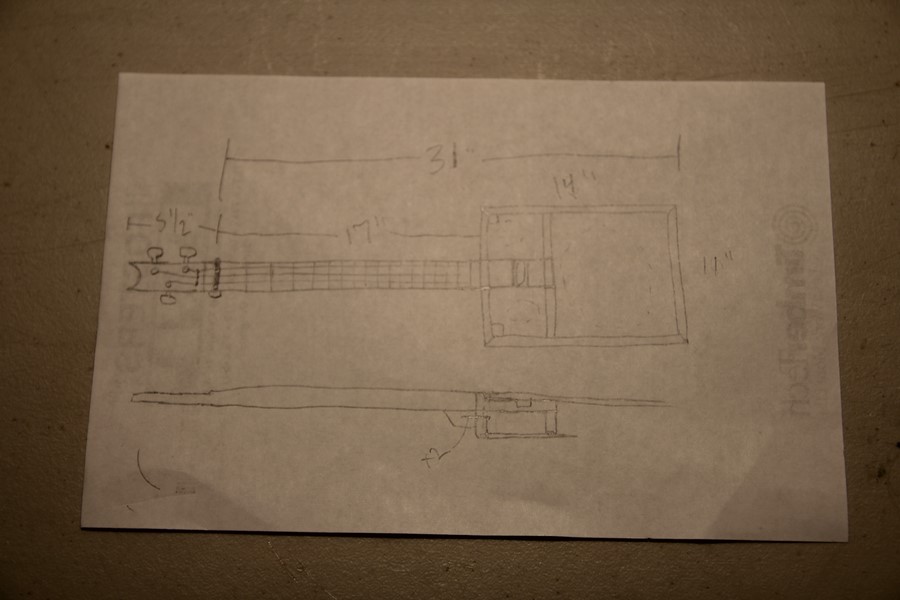
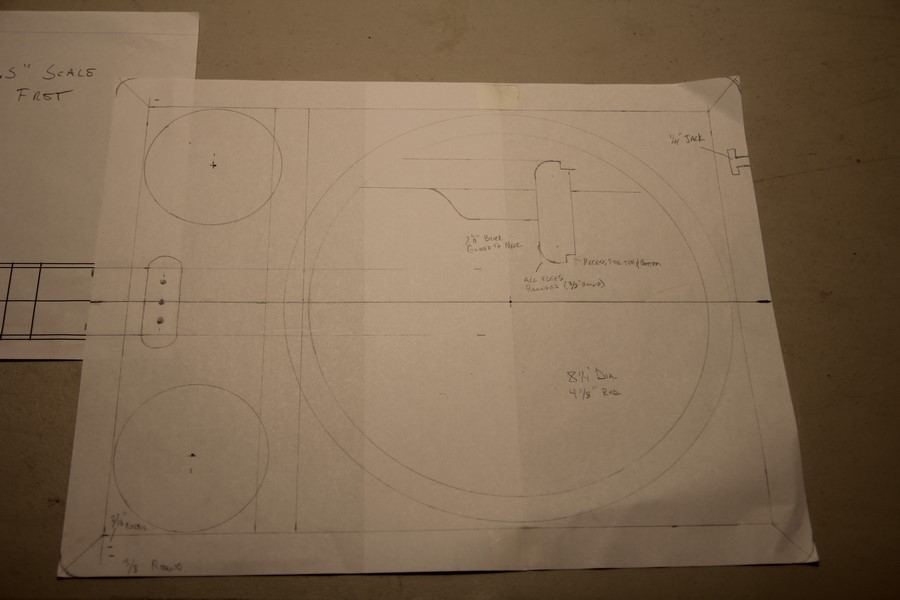
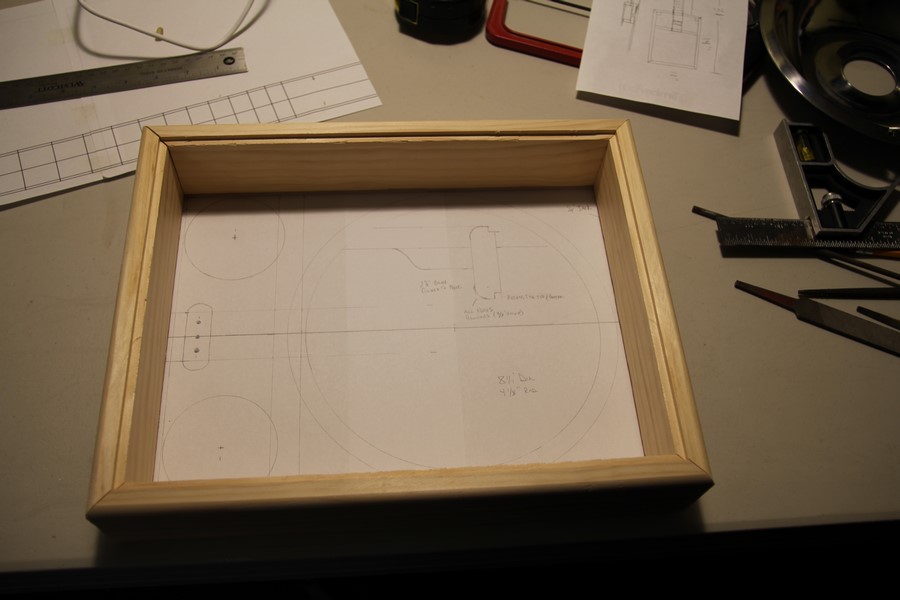
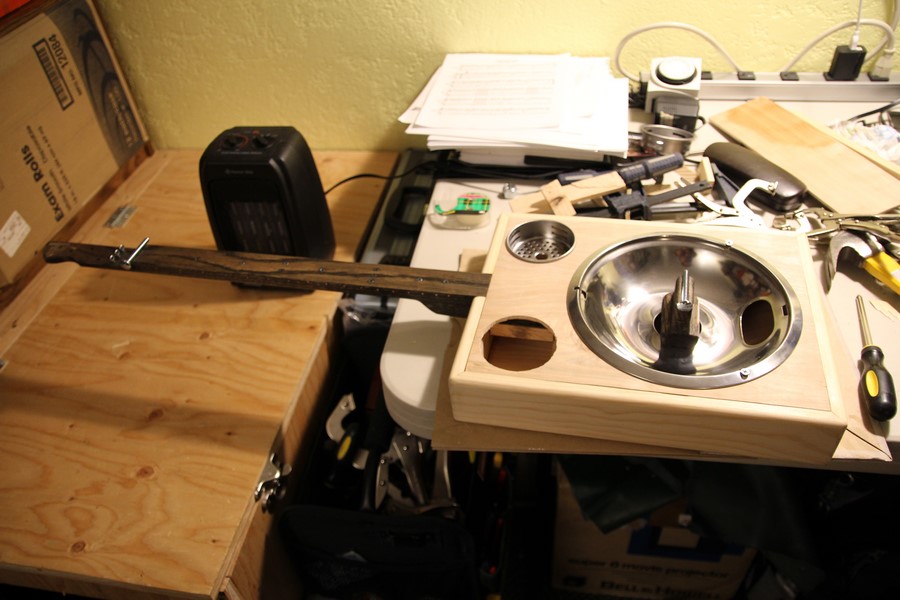
After finding my sound hole covers (sink strainers with tomato and cucumber removed) and the resonator cone (stove drip pan minus the burn on cheese), I used those parts to layout how big the emulated “cigar box” had to be for the parts to fit. Out comes the ruler and compass! A sudden flashback to High School Geometry, twitch twitch.
For the neck and the fret marker locations, I used an online tool that allows you to print a PDF of your neck to be for an easy transcription to the wood. The online tool can be found here:
http://www.ekips.org/tools/guitar/fretfind2d/
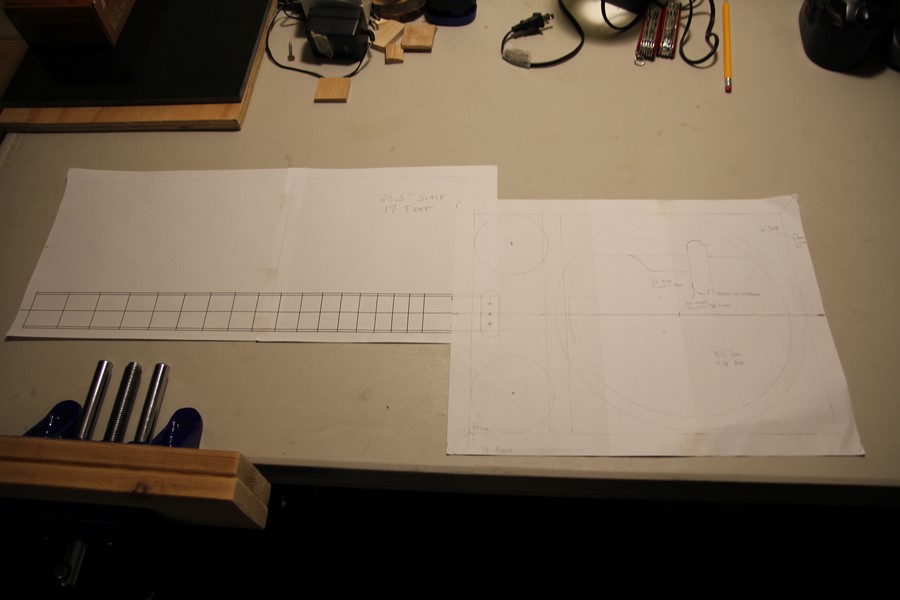
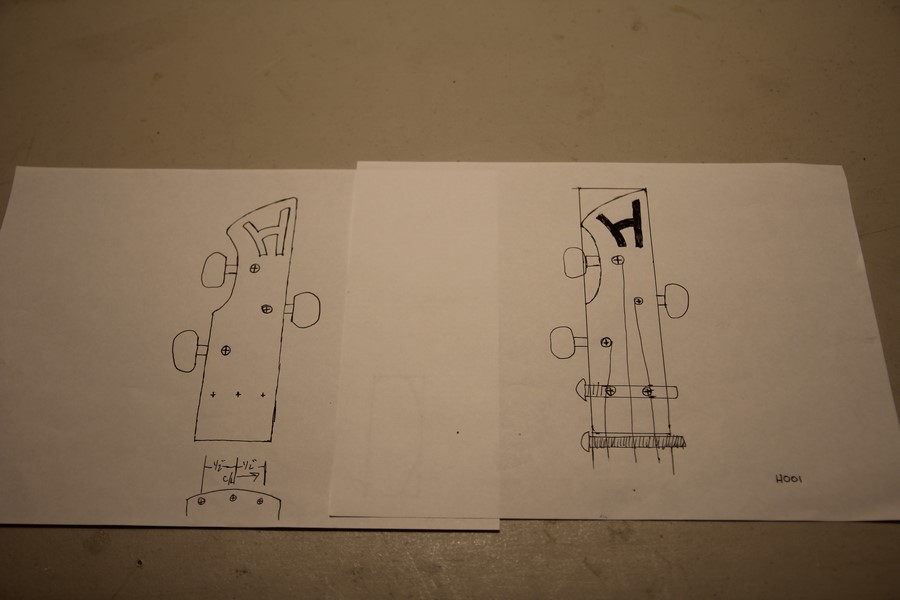
The final piece to the puzzle would be the head stock of the neck. Off to the drawing board.
Sourcing Parts (AKA Shopping!)
And the spree begins. Not really. One of my goals with this build was to mostly use items found at local stores or my own workshop. I am proud to say that only 3 items had to be ordered online and unfortunately they took forever to get to me.
Parts:
- 1″x3″x6′ select pine board (Lowes)
- 1″x2″x48″ red oak board (Lowes)
- 2’x4’x1/4″ sheet of birch plywood (Lowes)
- 2 sink strainers (Walmart)
- 1 stove top drip pan (Walmart)
- 1 set of tuning machines (online)
- 1 magnetic pickup with pre-wired jack (online)
- Strap buttons (online)
- Guitar strings
- Misc. screws, bolts, pieces of metal and a door striker plate from my workshop
Consumables:
- Titebond III wood glue
- Minwax ebony woodstain
- Tru Oil gun stock finish
Construction
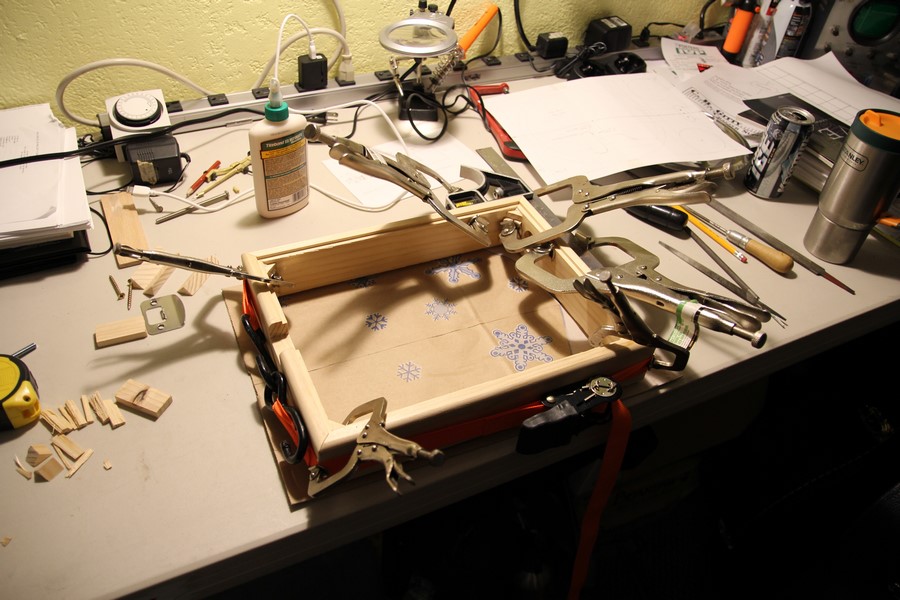
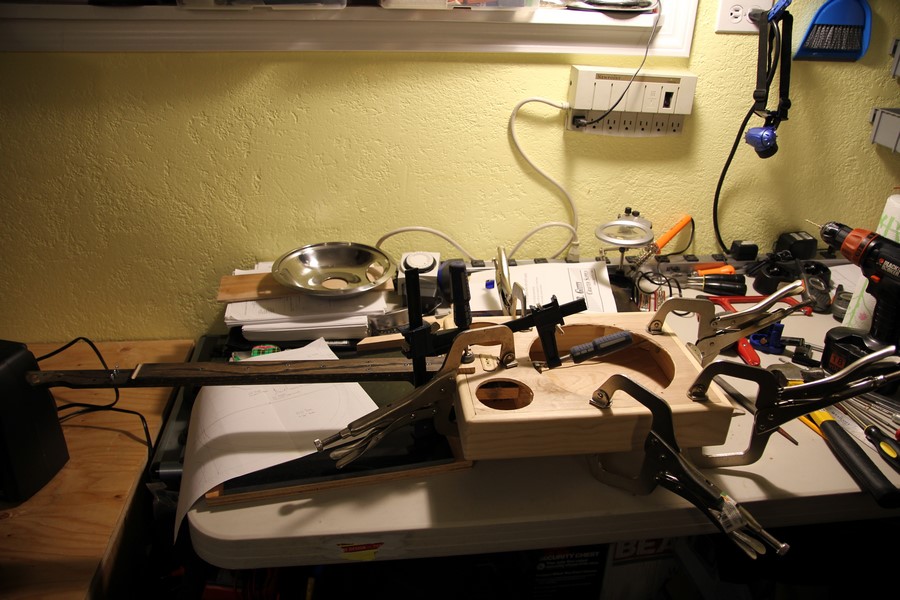
After cutting the pieces and introducing them to the various bits on my router table, it was time to break out the glue and have some fun. More like make a large mess, which can be fun too.
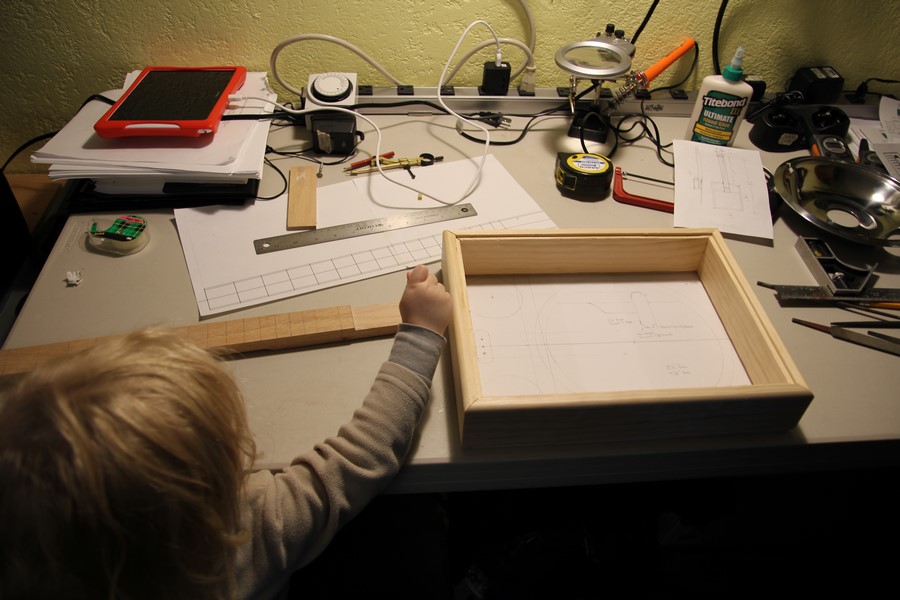
And yes, I did need my son’s help.
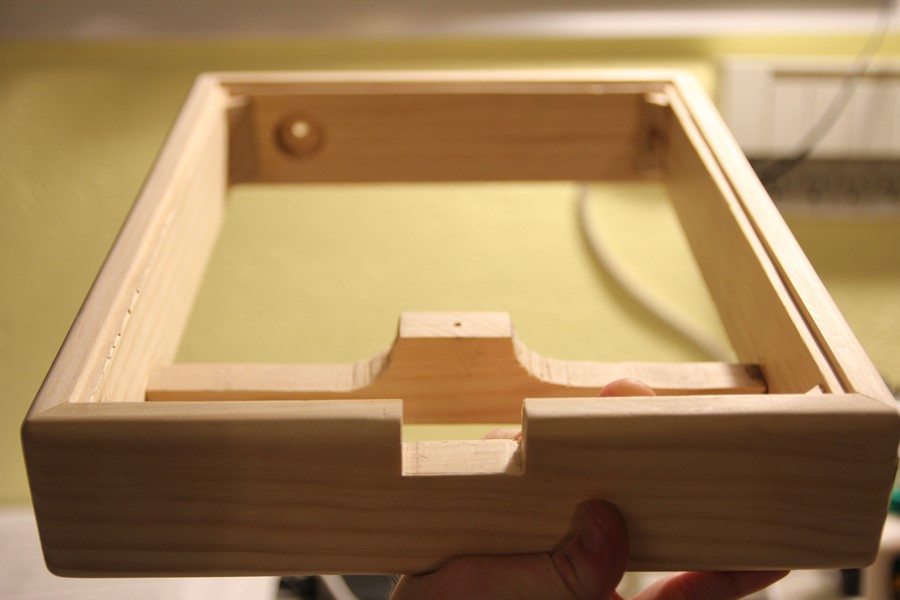
Cut outs for the neck and pickup jack were done before gluing.
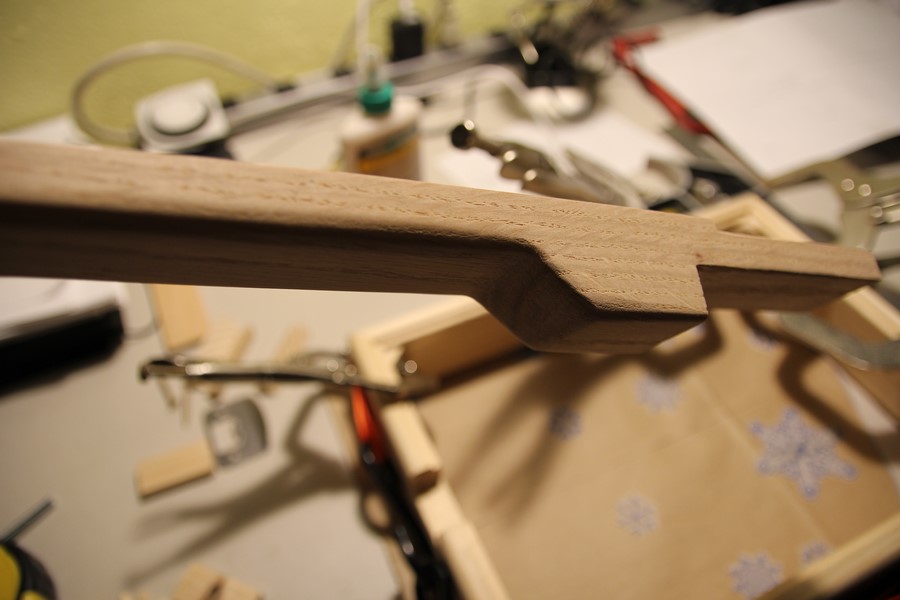
The head stock relief was cut out of the neck piece and fret locations marked. I then filed the grove for the nut (1/4″ carriage bolt).
")
")
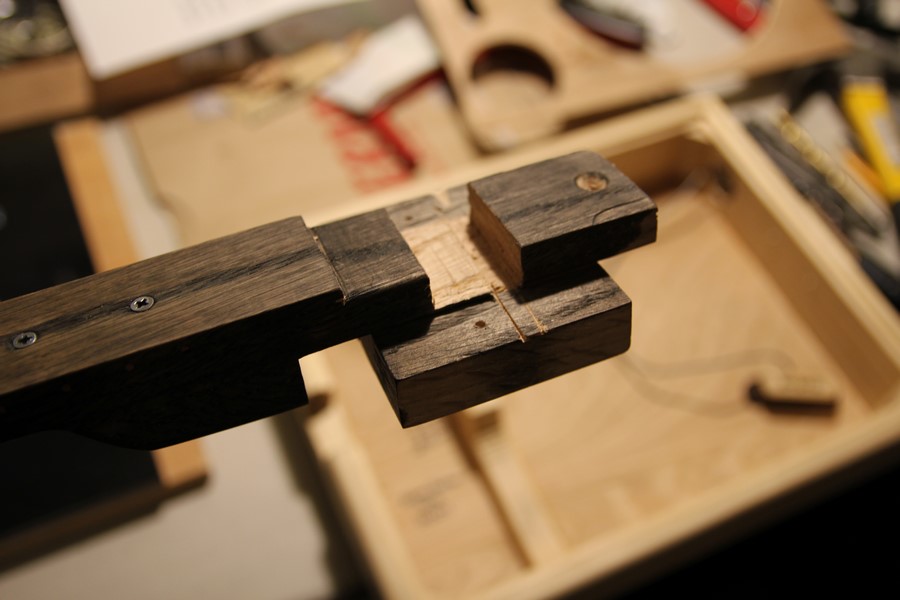
Next, the heel piece was glued and shaped.
It was time to dress up that neck. Make it look fancy or at least as good as I can with some junk from my workshop.
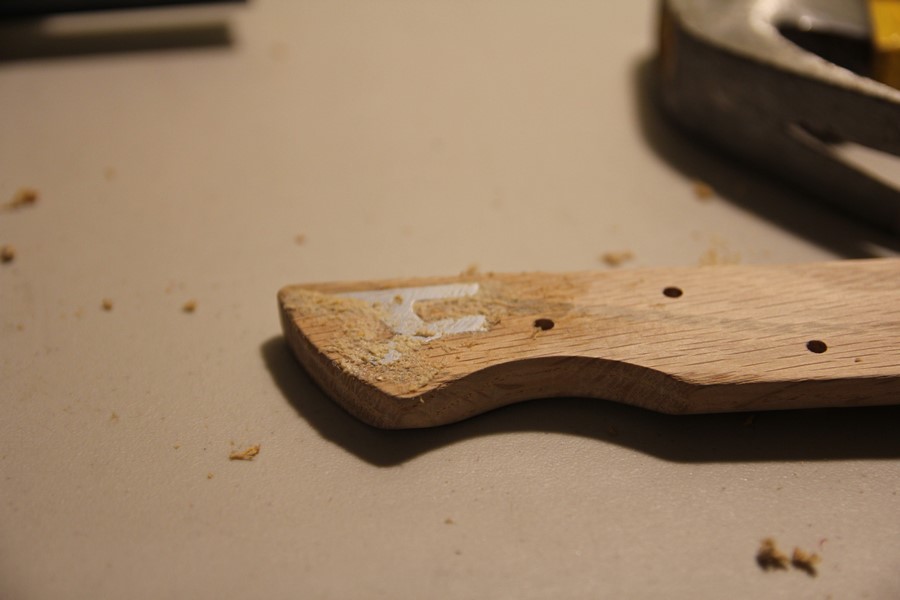
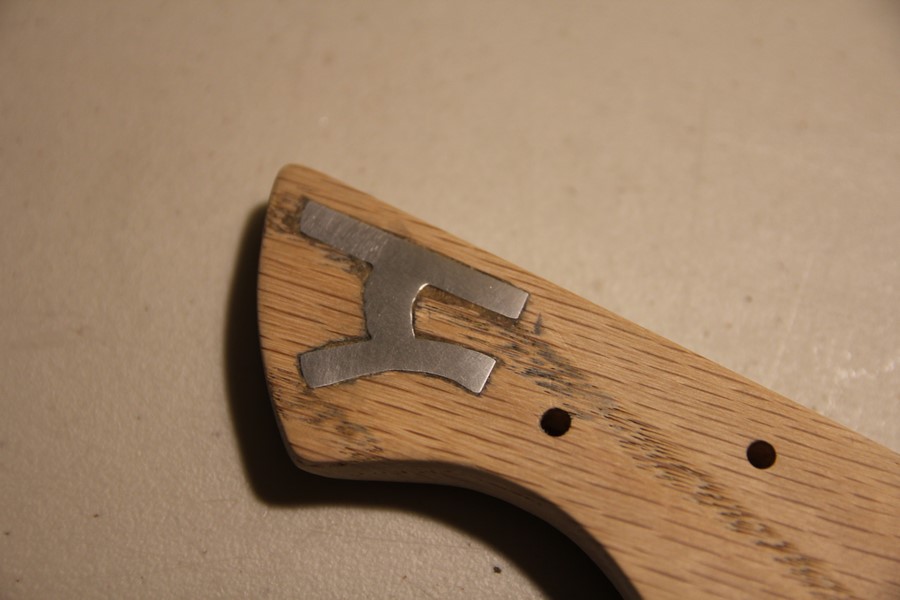
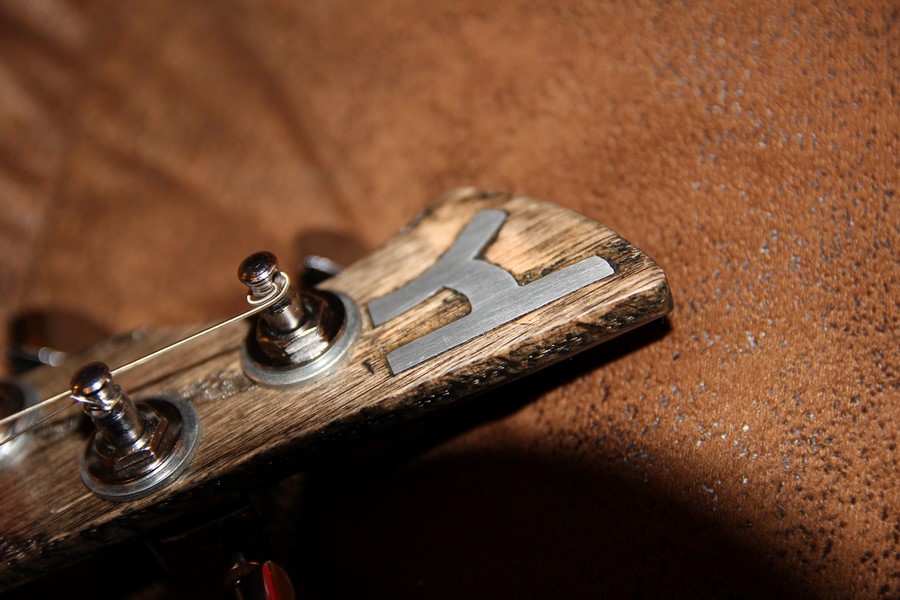
I started with an inlay on the head. I cut out and filed an “H” from some aluminum bar stock I had sitting around. Then came hours of chiseling out a spot for this “H” in the head using the small (I mean really small) chisel tip on a swiss army knife and a utility knife. Wow I really need to invest in some small wood chisels and wood knives. With a very light coating of homemade wood-filler (yes I too had woodshop in junior high) the head stock logo was done. Don’t worry, it looks better later. Really.
See, I told you.
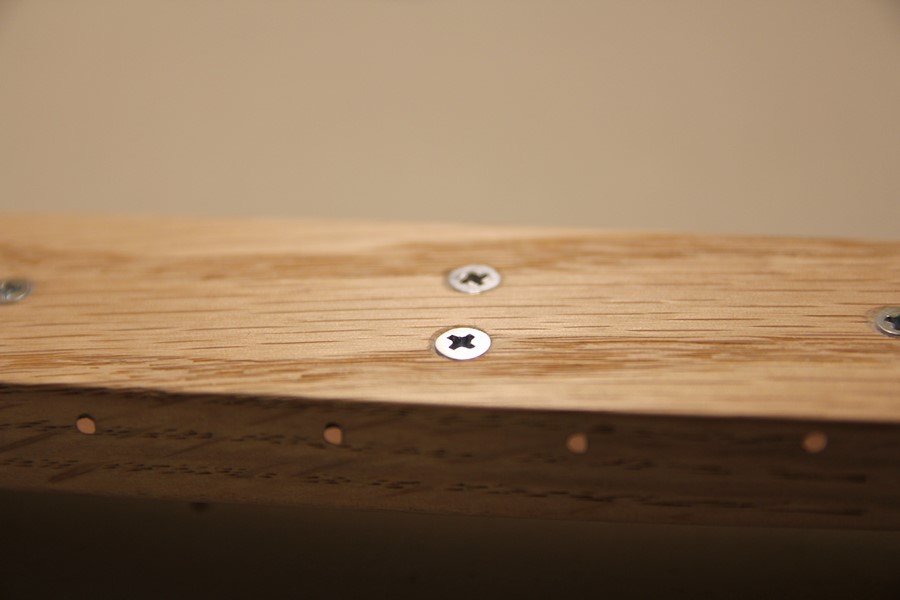
I decided to use some small wood screws counter-sunk as fret markers. This would keep the whole “found hardware” theme going. After gathering inspiration from the internet, I began the fret location markers. I used 12ga copper electrical wire (left over from a wiring project). After drilling tiny holes at the fret locations on the side of the neck, I shoved the wire in cut it off, smacked it with a hammer then filed them smooth. I know that it sounds quite violent but I assure you that no tools or guitar necks were injured in the making of.
Back to the box. It was time to cut the front and back. I could only glue the back because I was still waiting for the pickup to arrive. A hole and neck relief was needed for the pickup. Not something that I cared to guess at.
Time for some color. I wanted some contrast with this guitar. I decided to stain the neck ebony and leave the box natural.

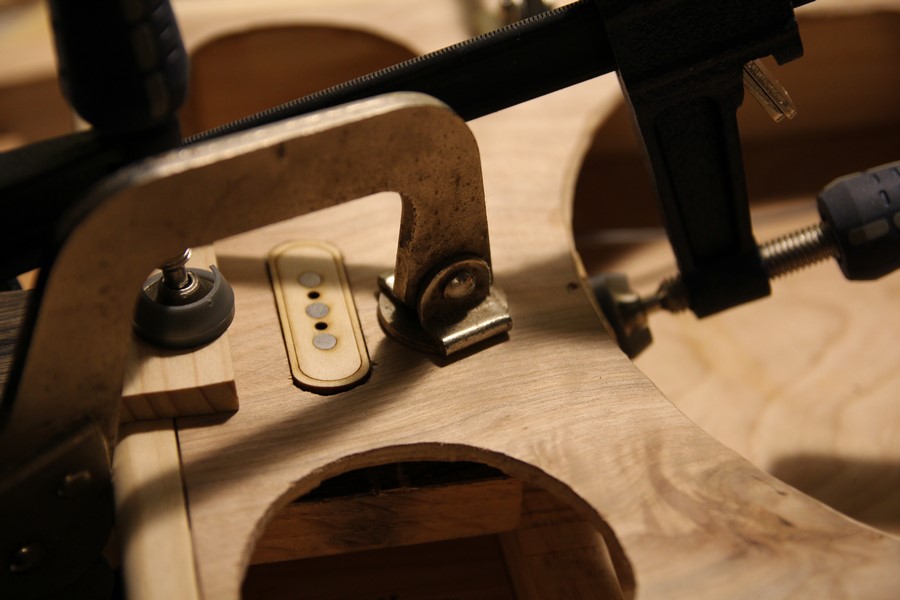
Ready for the initial mock up and bridge design. And what did I choose for the saddle? Why another carriage bolt of course.By the way, still waiting for the pickup. I guess it really was put on the slow boat from China.

Finally the pickup arrived. Time to cut provisions in the neck and top and squeeze that glue bottle again.
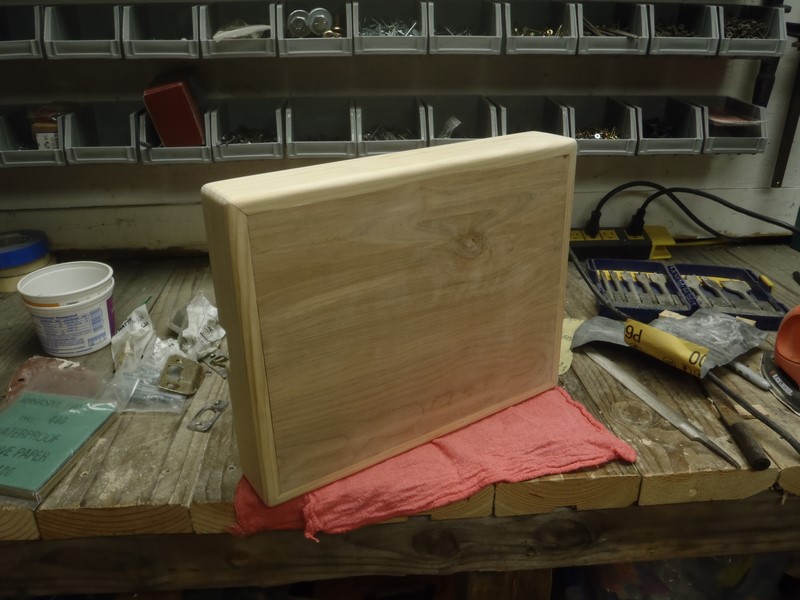
The part that I had really been looking forward too was the finish. After studying different finish options, I opted for a product called Tru Oil. It is a wipe on gun stock finish provides a hard lacquer-like coat over the wood. I ended up with 3 heavy coats on both the body and neck.


Putting It All Together
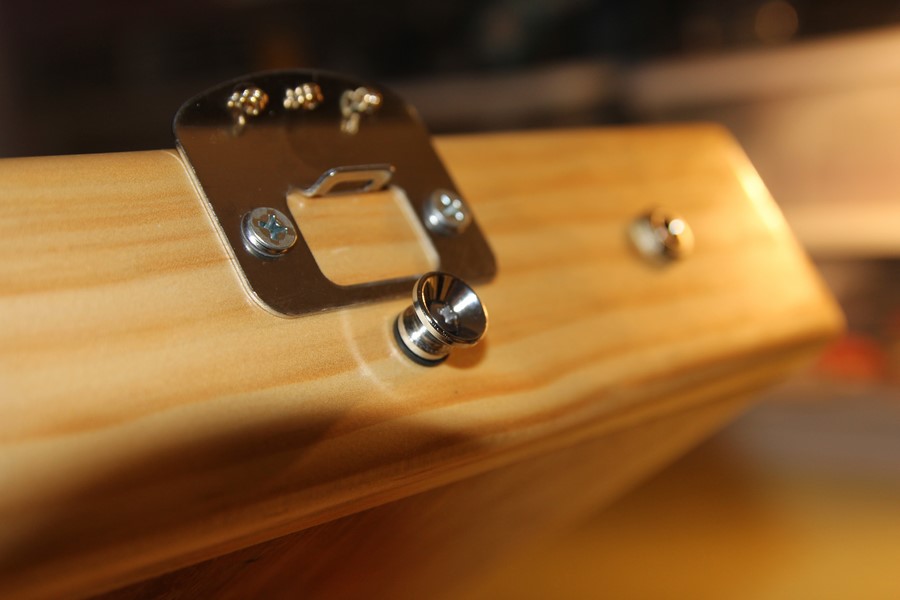
It was finally time to install all of the hardware. I used that door striker plate that I found for the string anchor point. I added the strap buttons and installed the tuning machines.

It was ready for strings. I used the .047 (A), .030 (D) and .017 (G) strings out of a pack of Ernie Ball Slinky Top Heavy Bottom electric guitar strings. I tuned the .047 to G, the .030 to D and the .017 to g. This is called open G tuning and is like a G power chord on a standard guitar.

Nothing left to do but play this thing. Yeah… rock out with your….. guitar.